Custom app for Microsoft Teams
Microsoft Teams is a Microsoft collaboration tool and gained more popularity during COVID-19, becoming Microsoft's fastest-growing business app ever. But beyond the capabilities of collaboration and meetings, it comes with a rich library of extension apps which you can add to your teams.
Microsoft Teams lets apps integrate into your team channels and enables team members to switch between your application and conversations smoothly with the same context using Single-Sign-On (SSO).
In this article, I'm going to walk you through the steps to create your first app for Microsoft Teams and add it as a tab to your organisation's team channel.
Before we start, you need to have a Microsoft Teams account. It could be your personal or organisational account. For this tutorial, I recommend using your personal account so you can add a custom app to the channels. If you want to use your organization account you need to be the owner of the team or have access to enable "Custom Teams App". You can find the instructions on how to enable the custom Teams app on Microsoft website.
Prepare your environment
We bootstrap this project using an open-source library called "generator-teams" from Microsoft 365 Patterns and Practices (PnP). This generator creates a JavaScript project using React framework. The generator itself uses a tool called "Yeoman" which is a client-side opinionated template generator. It takes care of creating everything to get started without any manual setup.
First, you need to have NodeJS installed on your machine. You can install the latest LTS version from NodeJS website.
To be able to scaffold the project you need Yeoman tool and for running build tasks you need "Gulp CLI" which you can install using the following command:
npm i -g yo gulp-cli
Install generator-teams globally so yo command can use this template and scaffold the project.
npm i -g generator-teams
Create the App
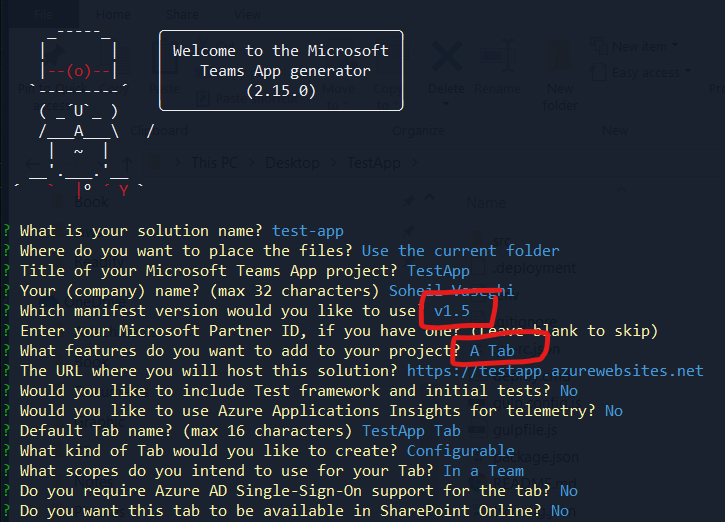
Now that the dependencies are installed you can use the yo command to generate the template code:
yo teams
You need to answer the questions to generate the template code based on your needs but for the sake of this tutorial we'll keep it simple and we won't include extra features in this project. For the manifest version select v1.5 which is the current general available schema and for the hosting URL go with the default value for now and we'll change it in the config file later.
After answering all the questions it'll take a few minutes to complete generating the code template.
Project structure
The project has been scaffolded to a React project and uses Gulp and Webpack for building and bundling the source code. Open the project in your favourite editor and navigate to the src directory. This is the directory that holds the source code for your application.
Your app component is in src/app/scripts/{your-app-name}/{your-app-name}.tsx. This component is the entry point to your app and you can see that it's a React component with the name of your application. If you want to customize your application you need to change this component.
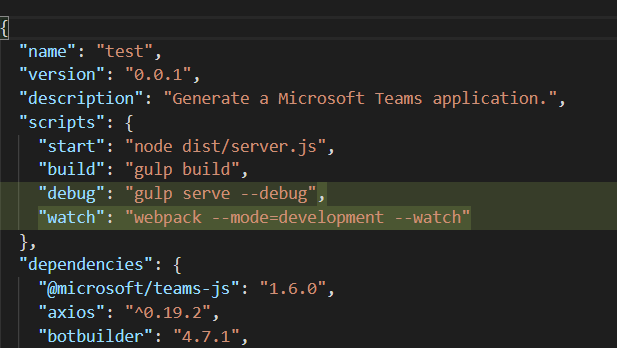
For building and bundling the application, a combination of Gulp and Webpack has been used. In /gulpfile.js you can see all the commands you can run against your code. Typically you don't need to modify this file since it's been designed in a way to work out of the box. But, in this tutorial, we will modify this file to make the build process more efficient.
For a more detailed description of each part of your app read the README.md file in your project.
Run your Application
For running your application locally you need a local webserver. gulp serve command builds the project and starts a local web server on port 3007. If you navigate to http://localhost:3007/ you should be able to see your application running. However, this is not your application component and if you want to preview your app, add your application name to the URL: http://localhost:3007/testAppTab/.
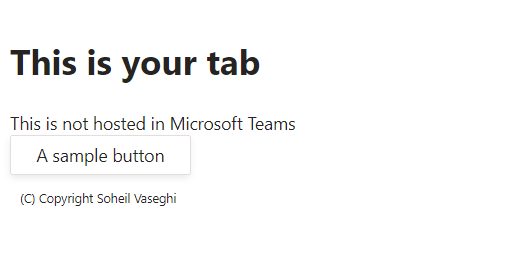
Congrats! Now you have a running app in your browser which you can upload to Microsoft Teams. But before that, we are going to fix the build performance in the next step.
Improve build performance
If you navigate to gulpfile.js and look at the available commands you'll see that the serve task is comprised of other tasks like build and watch, likewise the build task uses webpack and styles tasks. If we want to understand what exactly happens when we run any gulp command we need to trace all the sub-commands. The serve command builds the project using Webpack, watches for file changes (in debug mode), and rebuilds the project on any changes made to the code.
If you run the application in debug mode using npm run debug and modify any file in the src folder it'll trigger a new build for the entire project including the node_modules folder which is an expensive operation for every single change. On my machine, it'll take around 11 seconds for the "Hello World" project and it'll increase as you add more dependencies to your application.

For fixing this issue we are going to use Webpack SplitChunk Plugin which splits the bundles of vendor scripts (node modules) and our application scripts.
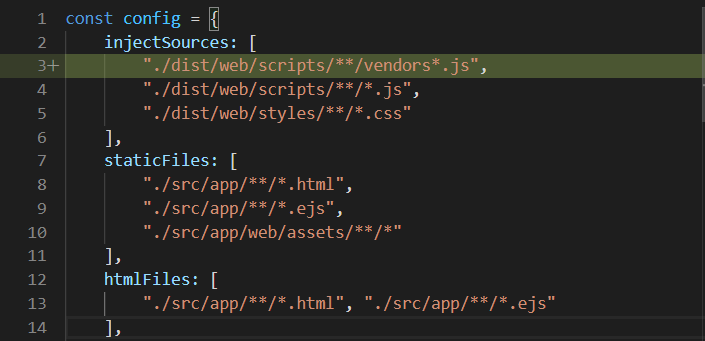
The first step to split scripts is to add vendor script to the inject sources of gulp.config.js file. This will tell gulp to include in the final HTML any JavaScript file where the name starts with vendors. All the node_modules and third-party libraries will go into this file and build won't touch this file on application code change. This has a huge impact on build time especially if you have many dependencies.
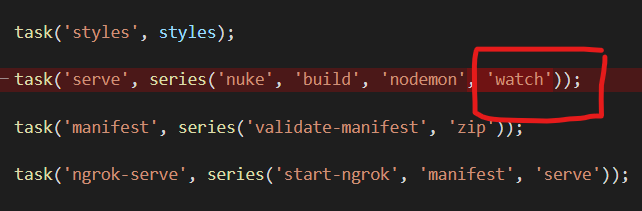
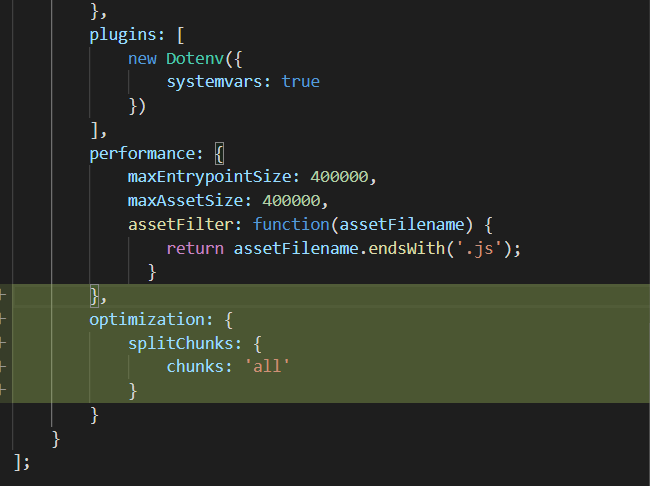
Swap Gulp watch with Webpack watch by removing watch from gulpfile.js...
...and adding Webpack watch as a script to package.json.
Finally, you need to enable the split chunk plugin by adding it to webpack.config.js:
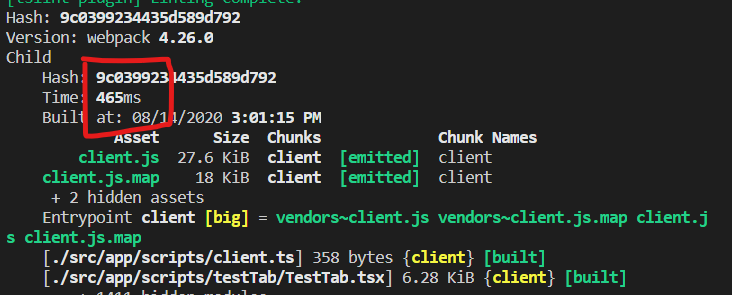
Now if you run your local server using gulp serve, it only builds the project for the first time and starts the webserver. For watch and rebuild you need to run npm run watch to watch for any changes to the source files and automatically rebuild the project. If we test the application using this new watch we can see that the build time has been reduced to around 500 milliseconds which is around 20 times faster for the almost empty project.
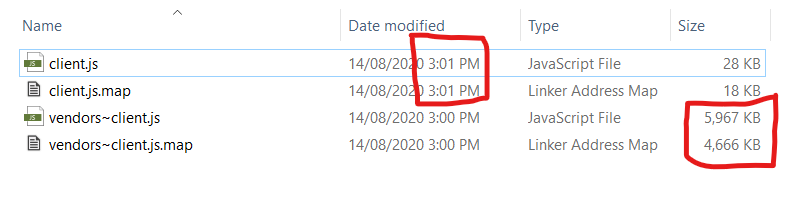
You can confirm split chunk is working by navigating to /dist/web/scripts where you can see two script files, one for node modules (vendors~client.js) and the other for your application code (client.js). It's obvious why the default approach should take longer by looking at the size of the vendor script bundle which is around 6 MB compared to the size of the client script which is 28 KB. Another point is the modified date of the vendor script bundle, which shows that this file hasn't been modified after the first build but client.js has been recreated every time we modified the source code.
Upload to the Teams
Uploading your application to Microsoft teams is done using a manifest file. If you run gulp manifest, it’ll generate a zipped manifest file in the /package directory. You can change the manifest details by modifying /src/manifest/manifest.json.
It's important to know that Microsoft Teams doesn't provide you with the hosting space for your app and you need to host it yourself somewhere which is publicly accessible. If you’re just going to test your application you can use ngrok (https://ngrok.com/) to host it from your localhost.
Run the following command to host it locally:
gulp ngrok-serve
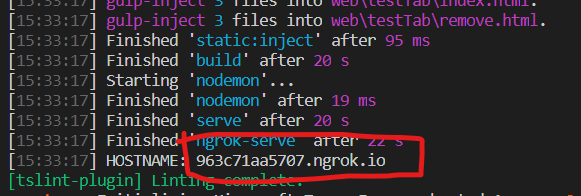
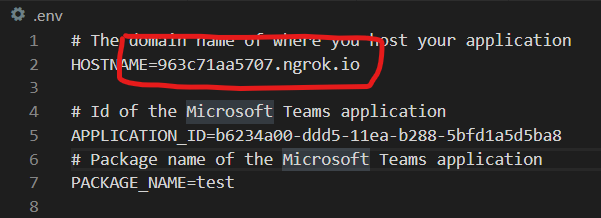
If you are using the free version of ngrok, when creating a proxy, it'll create a random subdomain for you. You'll then need to update the .env file with the automatically generated host and run gulp manifest to create the manifest file. You can confirm that your application is accessible from the internet by navigating to the ngrok URL.
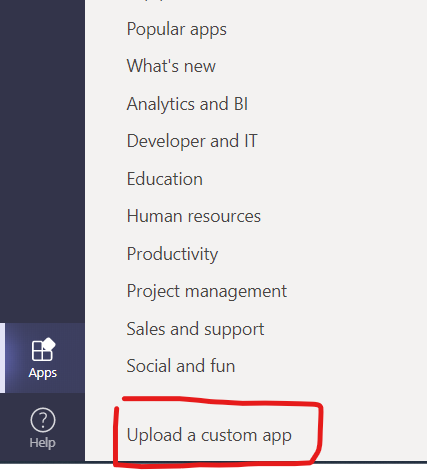
Once you've created the manifest package and tested that your application is accessible from the ngrok domain, open your Teams client, click on "Apps" at the bottom-left corner and select "Upload a custom app". Select your manifest package zip file located in /package/{your-app-name}.zip and add it to your application gallery.
Finally, you need to add your application as a tab to any channel you want. Click on the plus button next to your channels tab and add your application.
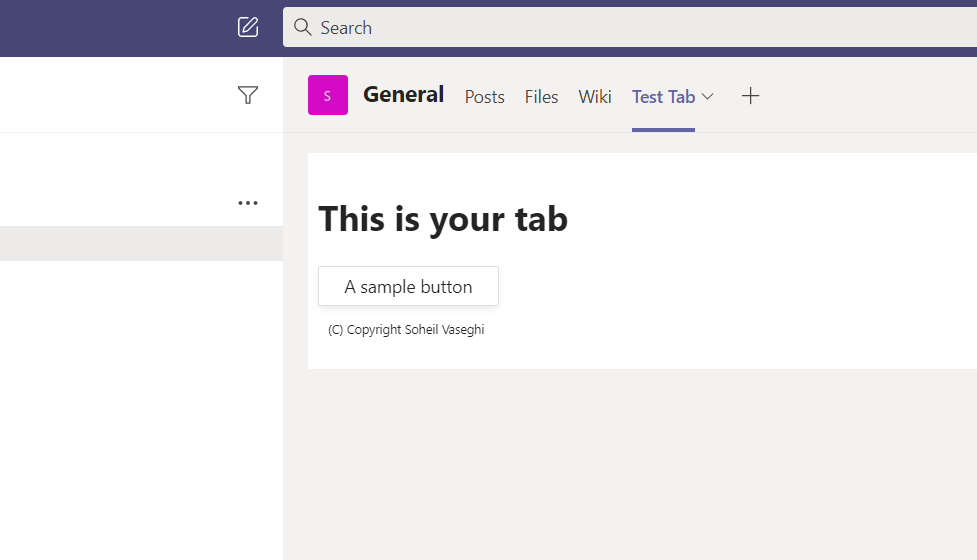
Congratulations! You've built and deployed your first Microsoft Teams App.